
On the Pure Adventures blog we’ve talked about how to avoid blisters, pick the perfect hiking boots and suggested ways to save on a hiking trip, setting you up for a memorable self-guided trip to Utah, Arizona or California.
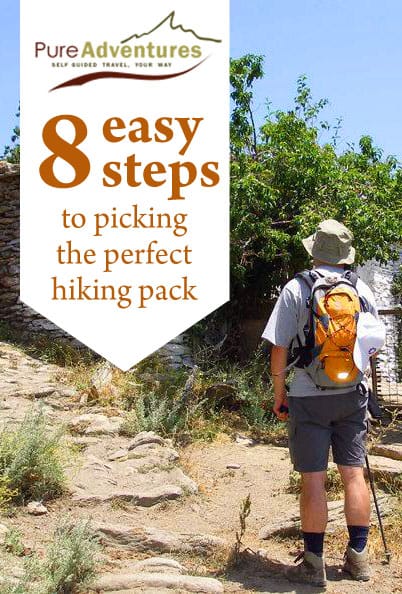
The final piece of the self guided gear puzzle is picking a pack.
Because backpacking forces you to carry all your belongings on your back, the natural idea is to pack as light as possible. Even when packing light, packs still weigh a lot – and feel heavier the farther you have to carry them – and it’s important to make sure you have one that fits well. So, how do you find a pack? Hiker Elaine Brewer shares her tips on how to pick a hiking pack.
Shop in store, not online
In this age of online shopping, it’s difficult for some people to pull themselves away from the computer and head out to a place that specializes in backpacking, especially if the pack you have in mind is cheaper online. It’s important to try the pack on in person to see how it fits. Next to your boots, it’s the single most important piece of hiker gear you will invest in – fit is critical.
Abandon brand bias
Have a pack in mind? Because of the color or the brand name? Don’t let that bias your decision. Even if you have a pack in mind, test ALL of the ones in that volume class that are available at the store you visit.
Verify volume
Packs come in different volumes, based on length of trip and in what conditions (i.e. winter gear is bulkier than summer gear). Consider packs under 50 liters for weekend trips, 50 to 70 for multi-day trips (3-5 days), and 70+ liters for extended trips (6 to 10+). The volume size also depends on your packing style – are you a minimalist or do you need the kitchen sink? If you’re unsure what volume pack you should be looking at, ask the pros at the store. All Pure Adventures’ self-guided hiking trips provide daily luggage transfers, and a pack under 50 liters is more than adequate for your daily gear.
Size matters
Many packs these days come in different sizes within the model. Usually they are small, medium, large, and sometimes extra large. These sizes typically correspond to the length of your torso and/or your hip circumference. Work with store staff to determine the correct size, then try it on to see if it feels comfortable. Brewer suggests hikers look for these things specifically:
- Free mobility of my arms. Arms are crucial in hiking and backpacking, especially if there is a scramble involved. When you sway your arms back, you don’t want to be knocking into the body of the pack.
- I hit my head on the brain, not the structure of the pack, when I look up. When you tilt your head up, you don’t want to smack it into the structure, or frame, of the pack. Most packs have brains (the extra space sitting on top of the pack’s main body) that will rise to head level or higher on the wearer.
- The hip belt is padded and fits nicely on my hips. Definitely look for a pack that has a padded hip belt. It may seem excessive at first, but your hips will be thanking you after your first day on the trails.
Fill it up
After the initial try-on, take off the pack and fill it with roughly the amount of gear you would use. Most outdoor sport stores will have bean bags to simulate weight in the pack. Put a light, bulky one in first, to simulate your sleeping bag. Then put some heavier bean bags in the middle, and again a light bag or two on top until the weight is something you think you’ll carry/want to carry on your trip.
Put it on
Put the pack back on (don’t just sling it over your shoulders like a school bag!), ask for help if you’ve never donned a pack before. The best way to don one, if there is not seat, is to balance it on your thigh with the shoulder straps facing you. Slide an arm through the appropriate shoulder strap and as you put it onto your back, lean forward so your back and not your shoulders are bearing the weight of the pack. Get your other arm in the other shoulder strap and secure the hip belt. Tighten it to a comfortable level, making sure the belt is snug and sitting on your pelvis. Stand up straight at this point, while you adjust the shoulder straps so the pack is not pulling away from your body. Secure all the bindings to a comfortable level – you want the weight of the pack to fall on the hips and not on your shoulders. The expert that the store can help you learn how to adjust the packs to fit as comfortably as possible.
Take a hike – figuratively speaking
Walk around the store with the pack (preferably with the boots that you’re planning on using for your adventure) for more than 20 minutes, if you can. If the store has an incline – usually in the shoe department – go up and down it a few times to feel how the bag shifts going up and down slopes.
Repeat ’til perfect
Repeat with all the packs that are the volume you’re looking for. Remember, even if the first one you try on is comfortable, there might be one that is even more comfortable. Your body will thank you if you take your time in trying packs on.